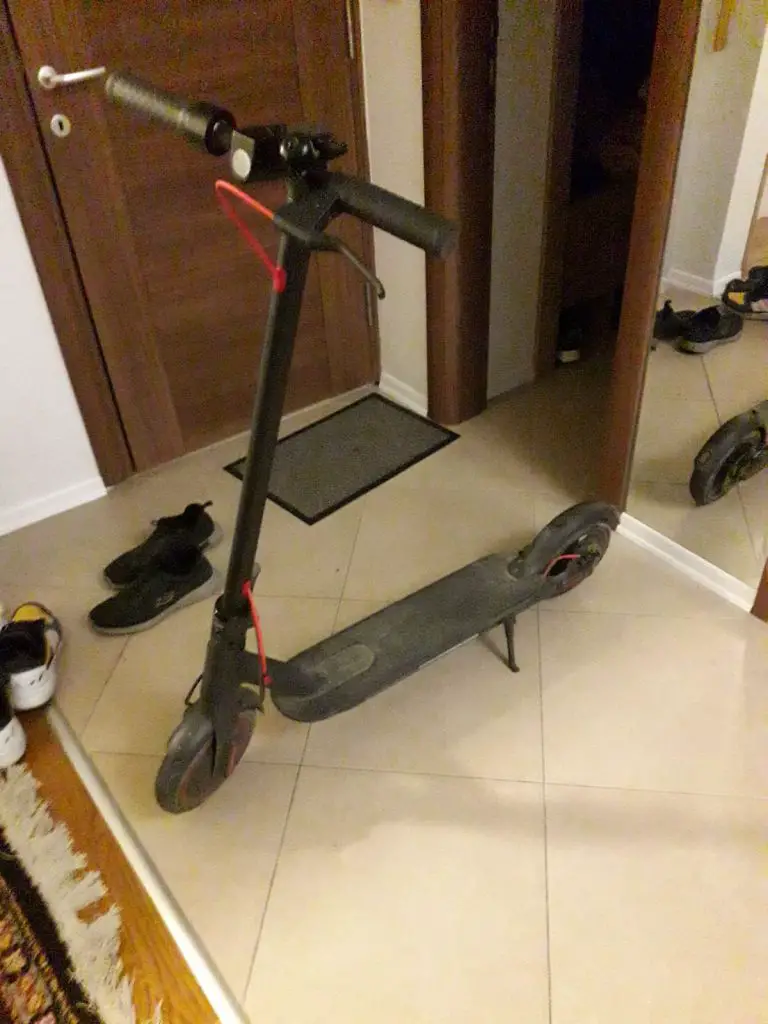
How to charge an electric scooter is a process many overlook or perform incorrectly. To ensure you don’t miss essential steps or harm your scooter in the long run, follow the steps outlined below.
-
 Let your scooter cool down before plugging in the chargerstep necessity: necessaryAvoid charging your scooter immediately after riding in hot weather, let the battery cool for at least 30 minutes. Failing to do so may damage the battery and reduce its lifespan.
 -
 Make sure your electric scooter or charger are not wetstep necessity: necessaryAfter riding in wet conditions, check for water on your scooter. Let it air dry for 30 minutes before charging. Avoid using a hairdryer, use a wet-dry vacuum if necessary, even for highly waterproof scooters.
 -
 Use an original chargerstep necessity: necessaryIf your charger is broken, avoid using a different brand or model. Best choices are to repair your charger or get a new one. If you use an alternative, match the voltage to avoid battery damage.
 -
 Charge in a dry, cool environmentstep necessity: necessaryCharge your scooter indoors at room temperature. Avoid temperatures below 0°C/32°F or above 45°C/113°F (source). Never charge it in direct sunlight to prevent battery and electronic damage, as well as safety risks like battery explosions.
 -
 Turn off your scooter while chargingstep necessity: optionalPower off your scooter during charging if it displays the battery level when turned off to prevent damage from simultaneous charging and discharging. If it doesn’t show the battery level, leave it on while charging.
 -
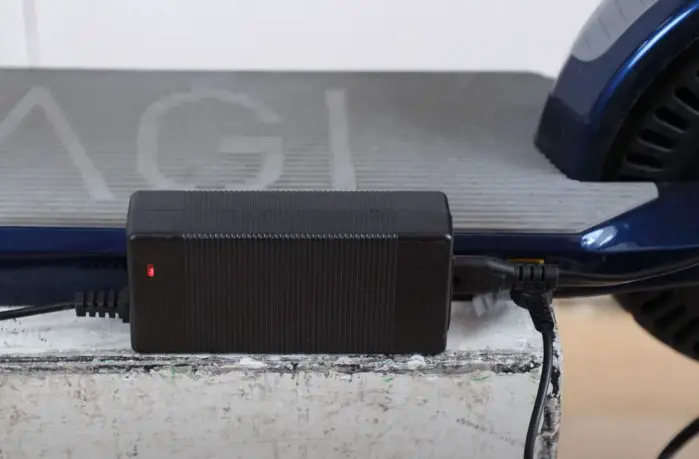
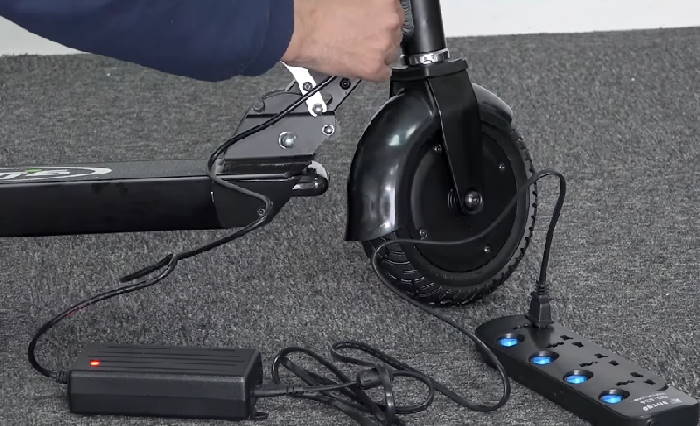
 Plug the charger into the power outlet firststep necessity: optionalFollow your manual’s charging sequence. Typically, plug into the wall first to prevent short circuits. If the wall outlet has issues, disconnect your scooter, limiting damage to the charger. Ensure the charger has a green light; if not, don’t use it—repair or replace.
 -
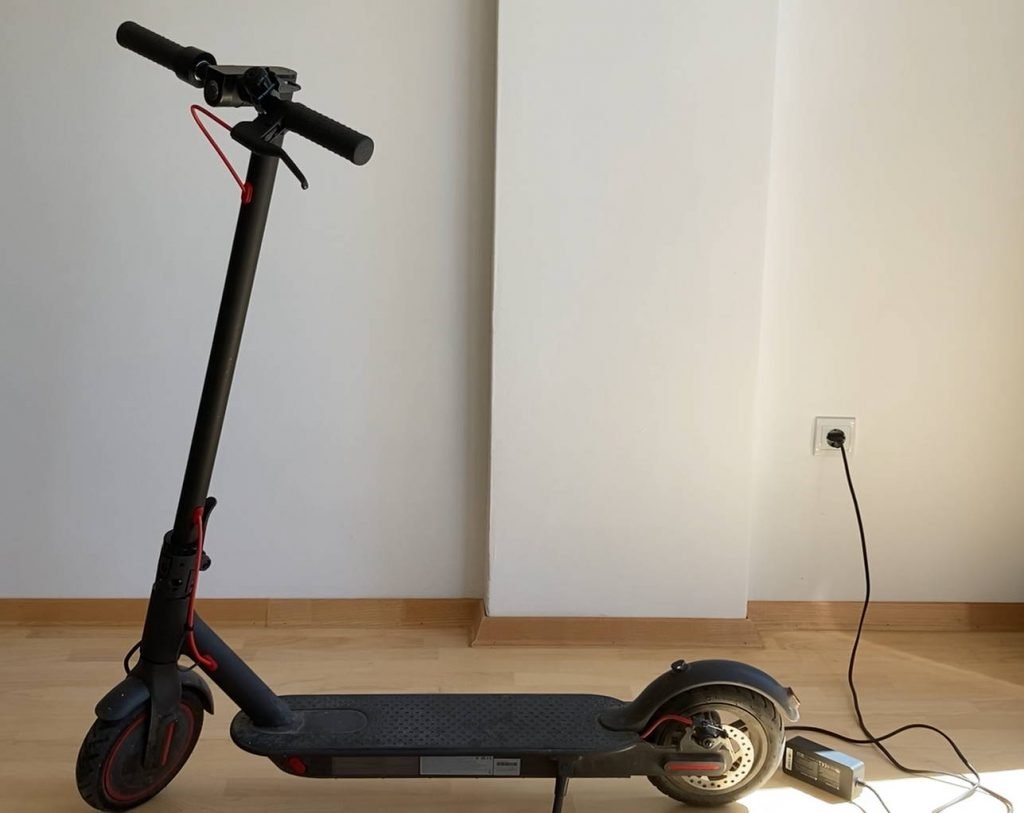
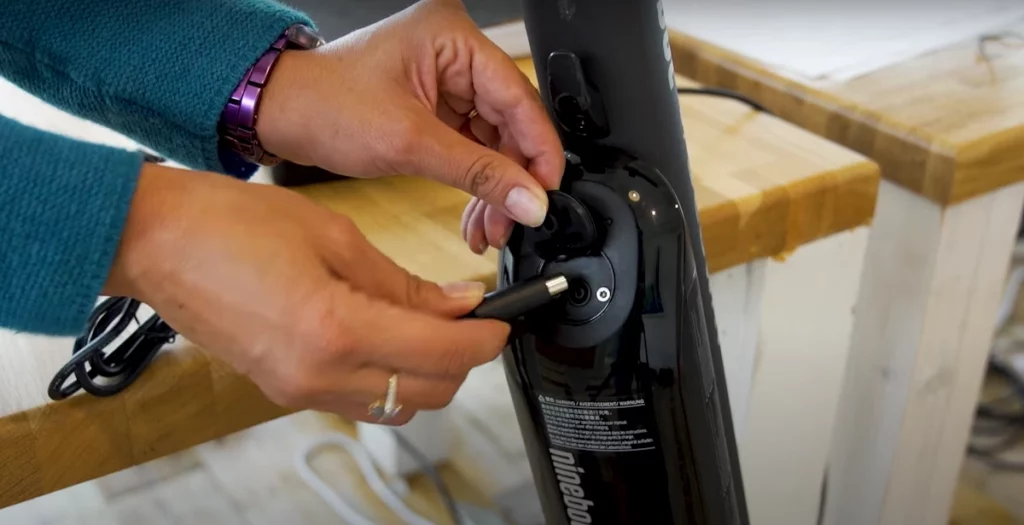 Plug the charger into the scooter’s charging portstep necessity: necessaryRemove the charging port cap, plug in the charger for your scooter to start charging. A green light on the charger indicates it’s working, red means charging, and green on the scooter signals completion.
 -
 Charge your battery until it’s fully charged (if possible)step necessity: optionalCharge your scooter fully when possible. Consult the manual or use an online calculator for ideal charging times. Partial charges are okay, but frequent deep discharges can harm the battery.
 -
 Unplug the chargerstep necessity: necessaryDisconnect the charger head from the scooter’s charging port before unplugging it from the outlet. Remove all connections when you’re away.
 -
 Avoid overcharging your batterystep necessity: necessaryUnplug your scooter shortly after it hits 100% to avoid overcharging. Set a daily routine based on the charging time, such as evening for a 3-hour charge or overnight for an 8-hour charge.
 -
 Don’t ride immediately after chargingstep necessity: optionalWait at least 5 minutes after charging before riding to ensure optimal battery life. Avoid riding while the battery is still heated from charging.
How to charge an electric scooter?
These are the steps you should know about charging your electric scooter properly.
1. Let your scooter cool down
Manuals often skip this step, yet it’s essential for increasing your battery’s lifespan.
Batteries and heat don’t work well together, especially during charging.
If you’ve just ridden your scooter in hot weather, let the battery and the other electronics cool down for at least 30 minutes before you plug in the charger.
Otherwise, you risk battery damage and shortening its lifespan.
2. Make sure your electric scooter and charger are not wet
If you’ve just ridden in wet conditions (rain, snow, ice, puddles, mud) your scooter may have some water that has accidentally ended up in the battery case or charging port.
If you see some water or other liquids on your scooter, let it dry, or dry it off yourself before you charge it.
My preferred method to dry a scooter is to let it air dry for at least 30 minutes after riding to allow the water to evaporate.
Even do this with the most waterproof electric scooter.
Avoid using a hairdryer, as it can push water inside the scooter. Use a wet-dry vacuum cleaner instead.
3. Use an original charger
If your charger is broken, resist using a charger from a different brand or another scooter model from the same brand.
The best options are to repair your existing charger or purchase a new one.
If you must use an alternative charger, ensure the voltage matches your original charger to prevent battery damage.
4. Charge in a dry, cool environment
Charge your scooter indoors at room temperature. Avoid extreme temperatures below 0°C/32°F or above 45°C/113°F (source).
Never charge it in direct sunlight.
Charging in these conditions can damage your scooter’s battery and other electronics, and pose safety risks, including the possibility of battery explosions.
5. Turn off your scooter while charging
If your scooter displays the battery level during charging when it’s turned off, power it off while charging to avoid simultaneous charging and discharging, which can damage the battery.
If your scooter doesn’t show the battery level when turned off, leave it on while charging.
6. Plug the charger into the power outlet first
The general rule is to plug the charger into the wall outlet first and then into your scooter.
However, consult your manual, and if it suggests plugging the charger into the scooter first, follow those instructions.
This sequence helps prevent short circuits and malfunctions. If there’s an issue when plugging into the wall outlet, you don’t want your scooter connected.
This way, any damage would be limited to the charger, keeping your scooter safe.
Always ensure the charger has a green indicator light when plugged in to verify its functionality. If the green light doesn’t illuminate, do not use the charger.
Instead, repair or replace it.
7. Plug the charger into the scooter’s charging port
Your scooter may have a charging port cap that you must remove to plug in the charging head.
Afterward, your scooter should begin charging.
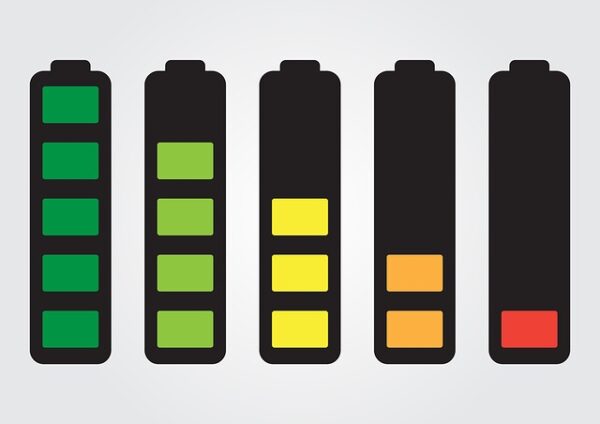
Most scooters indicate charging status through charger lights, on-screen battery status, and sometimes via their apps.
The rules of thumb are:
- A green light on the charger when only plugged into the power outlet indicates it’s working.
- A red light while charging means the scooter is still charging.
- A green light while plugged into the scooter means the charging is complete.
8. Charge your battery until it’s fully charged (if possible)
Charging your scooter fully every time is challenging.
However, aim to charge it to full whenever possible.
To determine your scooter’s ideal charging time, consult your manual, search online, or refer to the guide on electric scooter charging times.
If you can’t find the exact time for your model, use the electric scooter charge time calculator to get a general idea.
Not fully charging your scooter isn’t a big deal, partial charges are okay for lithium-ion batteries, but it’s best to charge fully to avoid frequent deep discharges, which can harm the battery.
9. Unplug the charger from your scooter
When your scooter is fully charged, disconnect the charger head from its charging port before unplugging it from the power outlet.
Don’t leave any connections when you’re away.
10. Avoid overcharging your battery
While many modern electric scooters have overcharging protection, it’s still best to unplug your scooter soon after it reaches 100% charge.
A few extra minutes plugged in won’t harm it but avoid extended overcharging, even with protection. Establish a daily charging routine based on your scooter’s charging time.
For instance, if it takes about 3 hours to charge, plug it in when you return from work and unplug it in the evening.
If it requires 8 hours, charge it overnight and unplug it in the morning.
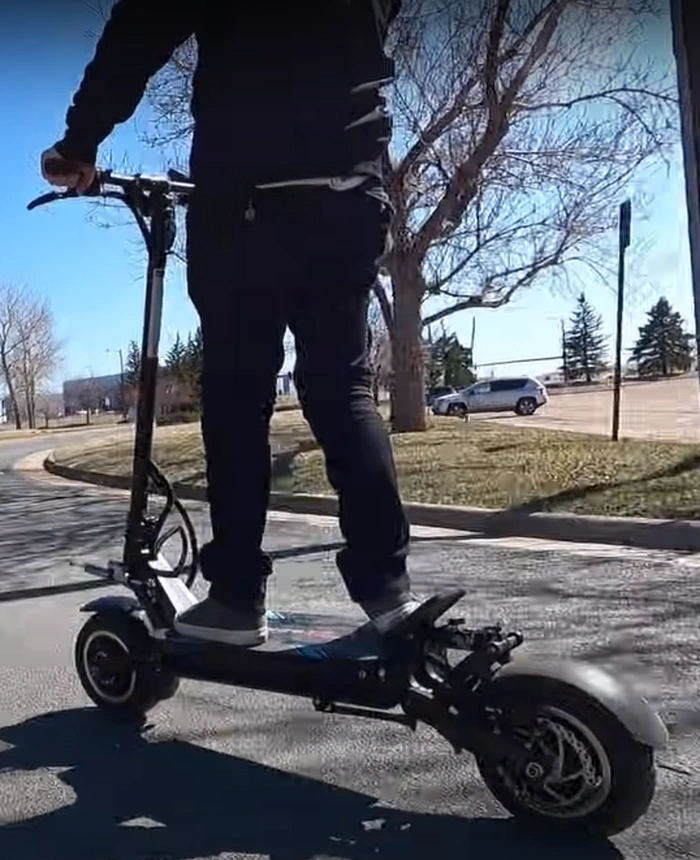
11. Don’t ride immediately after charging
If you want to make sure you’re doing everything you can to prolong your battery life, wait for at least 5 minutes after charging to ride.
The battery may still be heated from charging, and ideally, you shouldn’t ride it in that condition.
How to charge a Xiaomi scooter?
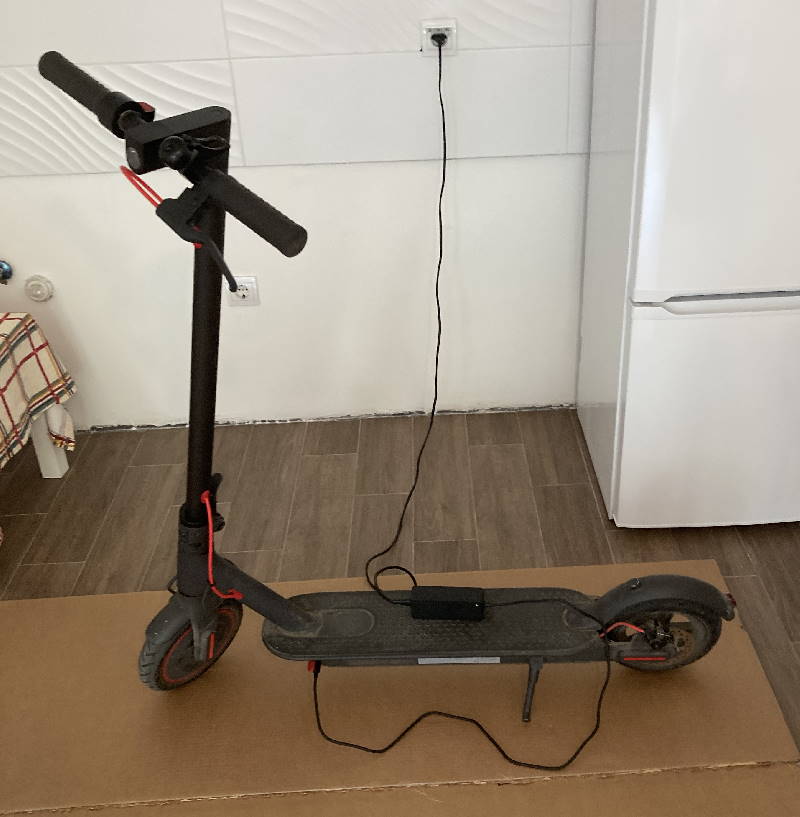
To charge a Xiaomi M365 or Xiaomi M365 Pro scooter:
- use only the original charger that came with your scooter, or an identical one
- don’t let your battery get completely drained
- make sure your scooter is completely dry before charging
- if you’ve just ridden your scooter, wait for a few minutes to cool off before plugging it in
- plug the charger in the power outlet, the green light on it should light up
- remove the charging port cap and plug the charger in, the charger light should be red
- charge until the battery is 100% full, the charger light should be green again
- unplug the charger from your scooter and from the wall
- wait for a few minutes before riding
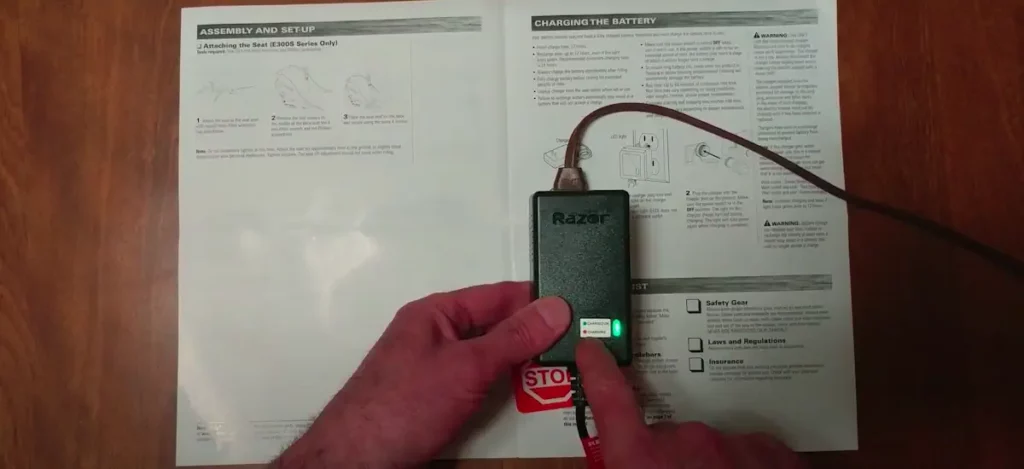
How to charge a Razor scooter?
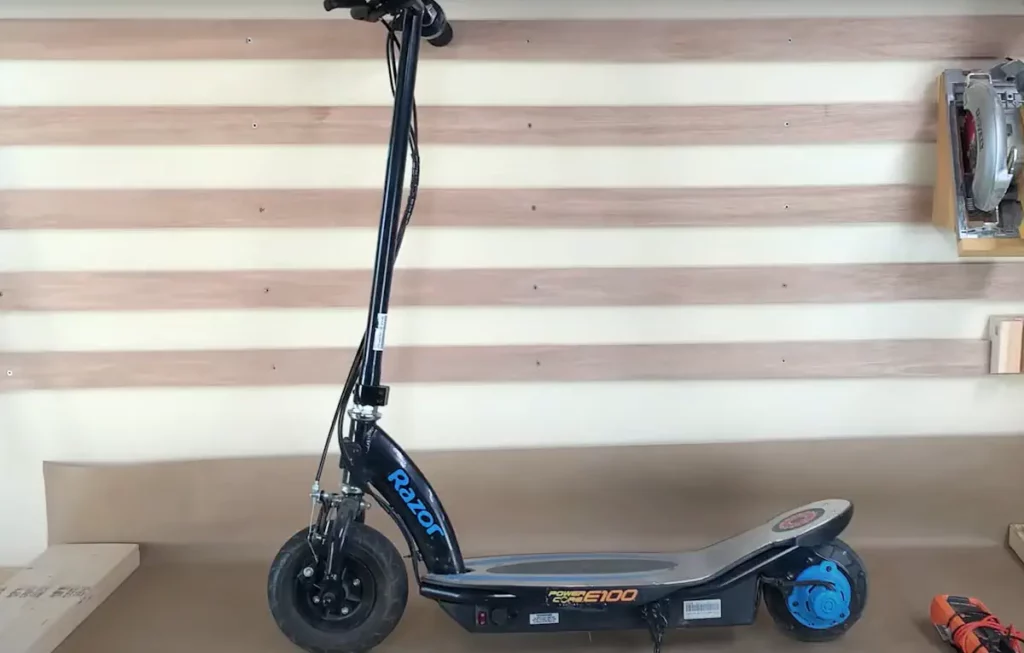
To charge a Razor scooter:
- use only an original charger
- avoid discharging your scooter’s battery completely
- your scooter and charger should not be wet before charging
- plug the charger in the power outlet, and the green light on it should light up
- plug the charging head into the charging port of your scooter, and the light on the charger should turn red
- unplug the charger from the wall and from the scooter
- wait for a few minutes before riding
How to charge Ninebot electric scooter?
To charge the Ninebot electric scooter:
- use only the original charger that came with your scooter, or an identical one
- don’t let your battery get completely drained
- make sure your scooter is completely dry before charging
- if you’ve just ridden your scooter, wait for a few minutes to cool off before plugging it in
- plug the charger in the power outlet, and the green light on it should light up
- charge until the battery is 100% full, the charger light should be green again
- unplug the charger from your scooter and from the wall
- wait for a few minutes before riding
How do electric scooters charge?
Electric scooters typically use lithium-ion batteries, similar to those in phones and laptops.
During charging, the power source (your outlet) supplies higher voltage than the battery’s output voltage, such as 42 V input and 37 V output for the battery, compared to the charger’s 100-240 V input and 42 V output.
This voltage differential causes a current to flow through the battery from the positive to the negative electrode, reversing the direction of current from when the battery is in use.
Electrons move from the positive to the negative electrode, effectively “filling” the battery (source).
Fast charging
Certain electric scooters, particularly those with larger battery capacities, offer fast charging using specialized chargers.
Fast chargers usually have higher amperage and voltage, and sometimes these settings can be adjusted by the owner. Fast charging speeds up the process due to increased amperage and voltage.
However, it’s important to note that using fast chargers often reduces the battery’s overall lifespan compared to using the standard charger, as faster charging can accelerate battery wear.
Dual charging
Some powerful and fast scooters offer dual charging with two ports for simultaneous charging, nearly doubling the charging speed.
While dual charging is not as ideal for battery life as regular charging, it’s generally better than fast charging because it doesn’t involve higher voltage, minimizing the impact on battery life.
Charger types
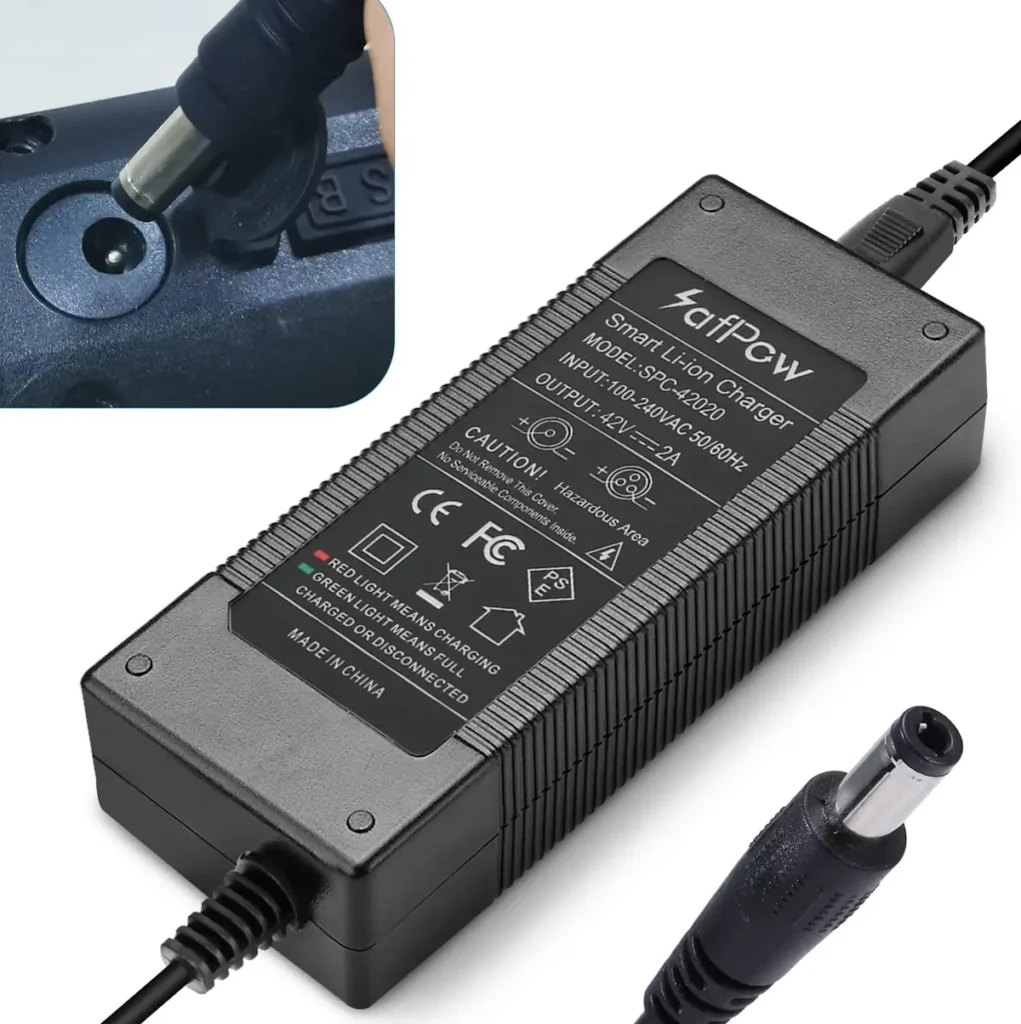
If you find yourself in need of a replacement charger or are uncertain about which one suits your scooter begin by examining the connector to ensure it’s the right fit for your scooter’s charging port.
Next, check the charger for voltage and current specifications.
Look for details like “DC Output” which indicates the voltage and maximum output current.
-
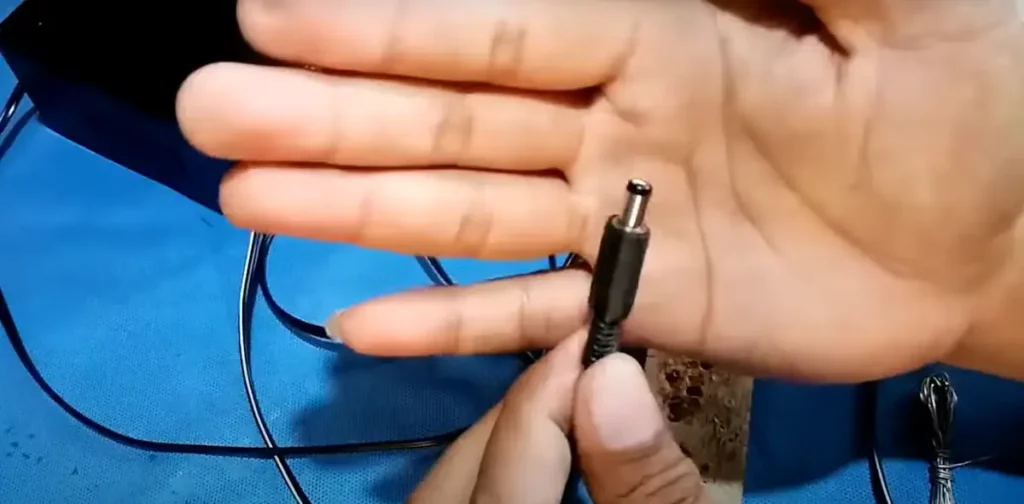 DC coaxial power plugThis connector type is common on smaller, less powerful scooters, including models like GOTRAX, Xiaomi, TurboAnt, and Segway Ninebot.
 -
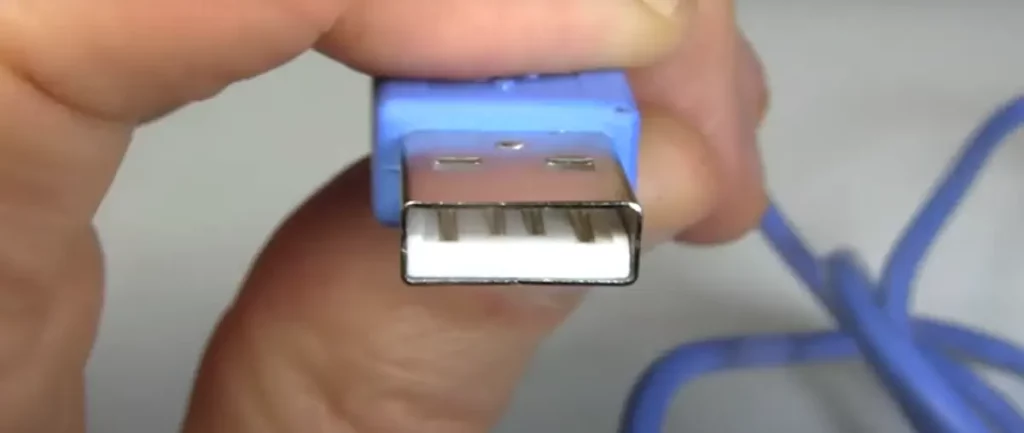 USB power connectorA square USB-style yellow power connector, although uncommon is used on the Unagi Model One.
 -
 XT60This square, keyed, two-pin connector is unusual and found on the Mercane WideWheel.
 -
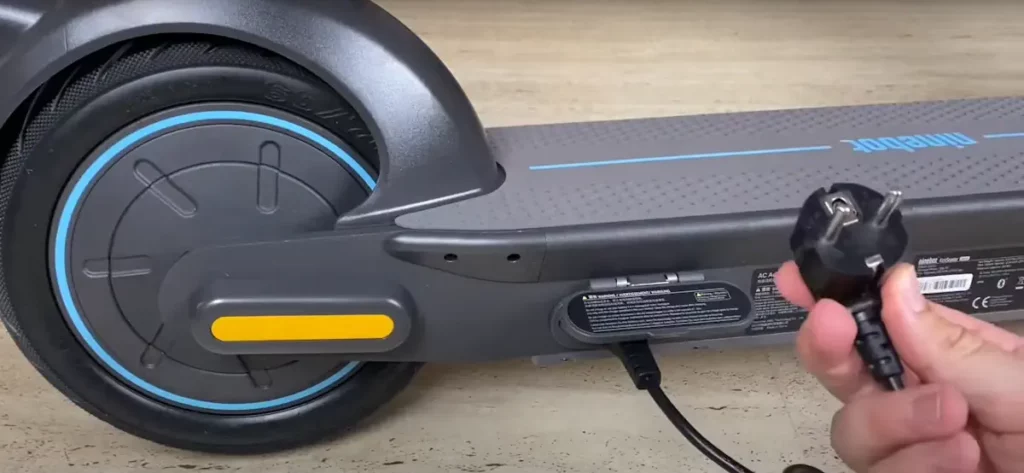
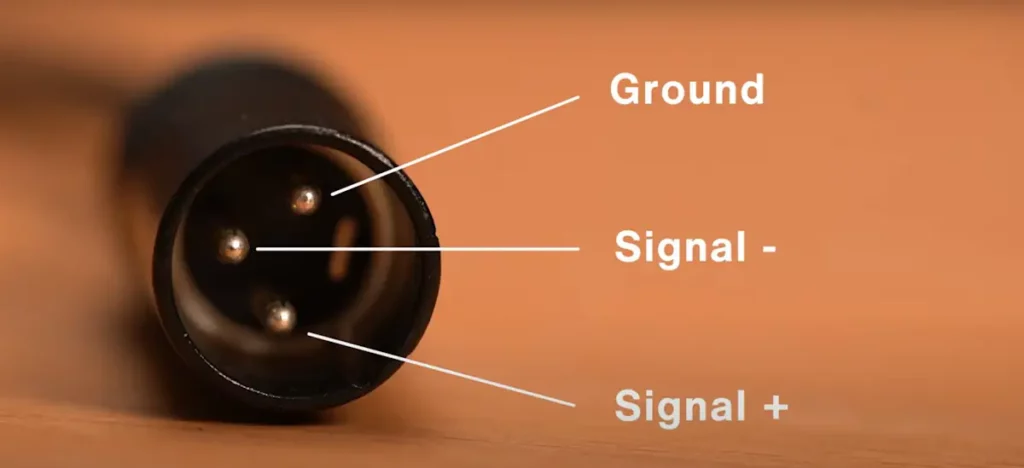 XLRThe circular, three-pin connector is more common, often used in audio applications and found on some Inokim scooters.
 -
 GX16-3PThis circular, three-pin connector with a threaded collar is highly prevalent in mid-range to larger scooters, such as Apollo, Kaabo, and Zero lineups.
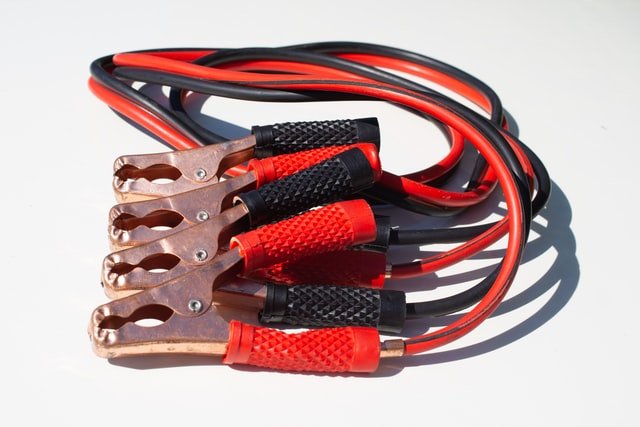
How to charge an electric scooter without a charger?
Before we discuss charging your scooter without a charger, it’s essential to stress that this should be avoided whenever possible. Using a different charger, let alone alternative methods, is strongly discouraged.
However, in exceptional circumstances, you might resort to this as a last option.
In such cases, you will require an alternative power source, such as a car battery and jumper cables.
To charge your electric scooter without a charger follow these steps:
- Turn off your scooter.
- Removing the battery may void the warranty.
- Identify the scooter battery’s positive (“+”) and negative (“-“) terminals, positive is often marked in red.
- Prevent contact between the jumper cable leads.
- Keep the black leads away from metal surfaces.
- Connect one red jumper cable lead to the scooter’s positive terminal.
- Attach the other red lead to the car battery’s positive terminal.
- Connect the black jumper cable lead to the car battery’s negative terminal.
- Attach the other black end to bare metal or a grounding point, do not connect it to the scooter’s battery.
- Start your car’s engine and let it run for a few minutes.
- Allow the scooter battery to charge.
- Remove the black lead from the grounding point, avoiding contact with anything.
- Carefully detach the red lead from the scooter battery, ensuring it doesn’t touch the black lead.
- Remove the red lead from the car battery.
- Disconnect the black lead from the car battery.
Check out this helpful YouTube tutorial that demonstrates the process using two car batteries, with your scooter’s battery acting as the dead car battery in this scenario.
Most electric scooters require 3 to 8 hours for a full charge. Popular and budget scooters usually take around 5 hours, while the overall average for all electric scooters is approximately 6 hours and 40 minutes.
Popular budget scooters charge in under 8 hours. Avoid charging them for a full 8-hour night to prevent overcharging. Charge overnight only if it matches your sleep schedule otherwise, choose a different time.
You don’t have to charge your scooter after every ride. In fact, with long-range scooters, you will probably go many rides without charging your scooter.
In power-saving mode, electric scooter charges can last up to 6 hours but typically average around 2 hours. In faster speed modes, the average duration is about 50 minutes. Higher-quality scooters can provide up to 6 or more hours of continuous riding on a single charge.


